Want to get into welding but don’t know where to start? Then learn how to MIG weld. It’s the easiest way to get into welding and it’s practical to do from almost anywhere too.
We’ll take you through the basics so that you can get to grips with MIG welding for beginners and learn to weld effectively and safely.

It’s an extremely useful skill that lends itself to a large number of practical situations. So, let us show you how to master this kind of welding in the simplest fashion.
GMAW – MIG Welding: What It Is?
What is MIG welding? It is a welding process in a form of arc welding where a wire, in a continuous and solid strip, is passed via a welding gun and into the weld pool where it burns to fuse two materials together.
What does MIG stand for in welding? It stands for Metal Inert Gas welding process. Shielding gas is required and is also passed via the welding gun to prevent the weld pool from becoming contaminated.

MIG welding is often known as Gas Metal Arc Welding (GMAW) or wire welding (which is the colloquial term for it). It is a popular form of welding which is capable of welding (for maintenance and repair purposes) anything from 24 gauge materials to those of a half-inch thickness. It’s also relatively easy to learn how to MIG weld.
This is because the electrode (the MIG welding wire) isn’t exhausted, unlike in ARC welding where it is fully consumed, and thus the welder only needs to track a seam while they maintain a steady tip to arc gap.
Advantages
- You can easily join different materials in a range of thicknesses
- You can weld in all positions
- Weld spatter is kept to a minimum
- You can learn how to MIG weld easily
Disadvantages
- You can’t weld materials of more than half an inch thick
- The need for shielding gas reduces the portability of the equipment
- The process offers less control over the weld than Tungsten Inert Gas (TIG) welding
GMAW: How Does It Work?
It uses three components to deliver a weld:
- Electricity (to generate the heat required)
- An electrode (the wire passed through the gun)
- Shielding gas (to stop air from contaminating the weld)
Thus, the operator controls the amount of weld being done and the electrode is fed through the gun automatically in a continuous fashion. They do this by pulling the trigger on the gun.
As they pull the trigger, electricity is passed to the gun to heat the electrodes and the wire to be fed into the gun, and as the wire reaches the nozzle, the shield gas is released to protect the weld.
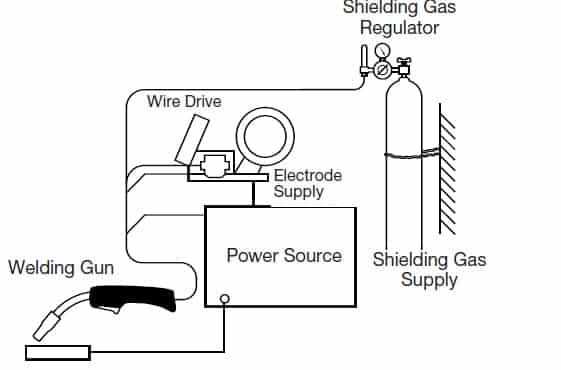
Then when the electrode comes into contact with the metal to be welded, the arc is complete and the wire begins to melt at the joint of the weld. All the while, the shield gas ensures that no contaminants are absorbed into the weld.
MIG Welding Machine: How It Works
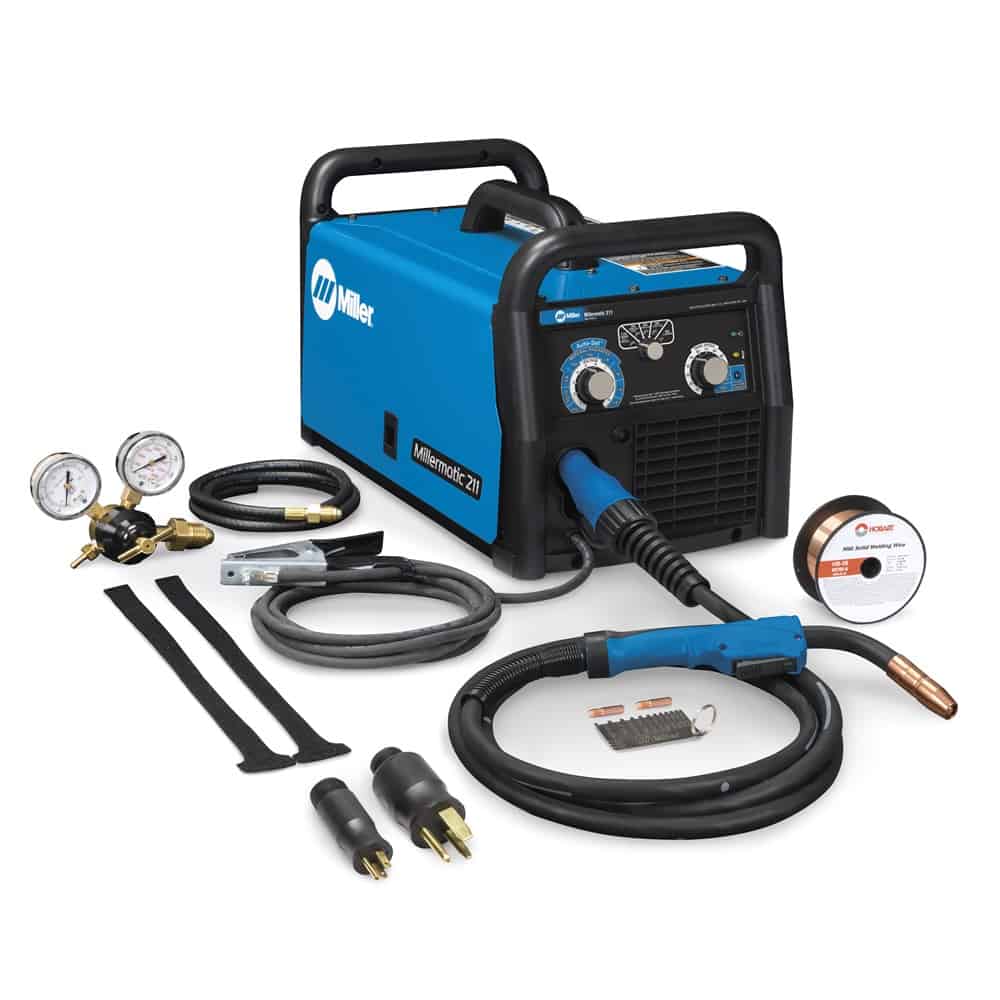
What is a MIG welder? The core tool is the welding MIG machine. MIG welders are where the wire, the gas, and the electricity combine to deliver a weld via the welding gun.
The machine gives the user control over how fast the wire will be fed to the gun, the polarity of the electrodes, and the amperage which dictates the available current (which, in turn, is dictated by the materials that you intend to weld and how thick they are).
Most people will get started with a 115 Volt welding machine. However, it’s worth noting at this point that you can get a dual-voltage machine which will also go to 230 Volts if you need more power for your welds. If you look inside the machine, you’ll find the wire in a spool and some rollers which will be used to send the wire out to the gun.
The spool is meant to be attached with a tension nut. This ought to be set so that the wire won’t unravel easily from the spool but, at the same time, not so that the rollers can’t move the wire when required to do so. If you are also interested in getting a new MIG welder I have made a list of the best MIG welders all with reviews that you can check.
The Gas Cylinder For MIG Welding
In almost all instances, you’re going to need a shielding gas if you want your weld to hold and that means somewhere behind your machine will be a tank of that gas.
This is most likely going to be a tank that contains Argon (at 100%) or a blend of Carbon Dioxide (CO2) and Argon. As the weld is created, the gas is used to shield it from impurities from the air or dust in the environment.
It’s important to choose the right gas because otherwise, you may end up with a weak or porous weld and it can also cause excessive spatter around the weld, which means more effort to clean it after.
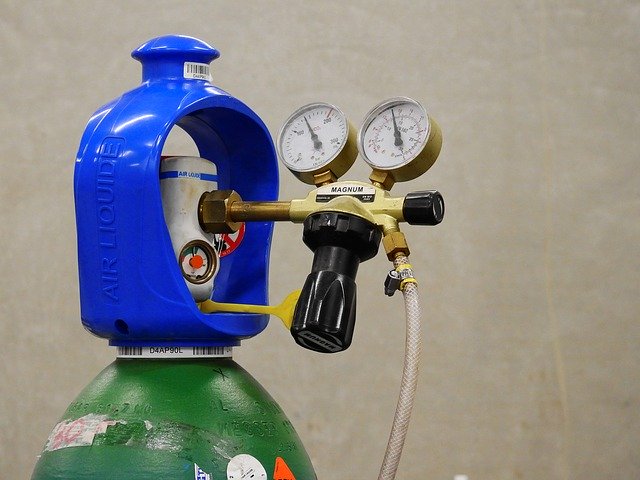
Before you begin, check the tank and make sure there is gas in it. The gauge should show between 2500 PSI (full) and 0 PSI (empty) and your regulator ought to then be set on your machine at between 25 and 15 PSI (this will vary based on your preferences and what kind of gun you’re using).
What gas should you choose?
- An Argon and CO2 Blend (75/25). This is the best choice if you want an all-purpose mix. You’ll get very little spatter and the bead will have the best look and it won’t lead to burn-through on the thinnest metals.
- 100% CO2 welding. You’ll get a greater degree of penetration with just Carbon Dioxide but it can make the spatter worse and you’ll also observe a rougher bead than with a blend.
When you buy a welding machine it’s best to get one that will handle the gas and the wire and not one that only takes “flux core”. You can get decent results with flux core if you’re outdoors and have a bit of breeze blowing but it’s really bad at working with thin metals. And if you’re expecting to MIG weld on body panels for vehicles, flux core often ends up blowing holes in things.
The MIG Gun
You can’t weld without a welding gun, it handles the serious stuff when you’re working. MIG welders will pretty much always come with the MIG gun.
Its primary component is a trigger that enables the feeding of the wire when the electricity flows.
The wire speed will depend on your settings. There’s a copper tip (which is fully replaceable when it inevitably wears out) that guides the wire.
You will find that there are different tips that can be used with different sizes of wire. Most of the time, this is already going to be set up for you. The exterior of the tip will normally have a metal or possibly ceramic cup that stops the electrode from being interfered with and forces the gas out in the right direction from the MIG gun.
The Ground Clamp
Your ground clamp forms the negative (cathode) terminal of the welding circuit. It must be clamped on the metal you are welding or a metal welding table before you start welding.
The Importance Of Welding Safety
What Safety Gear Do You Need?
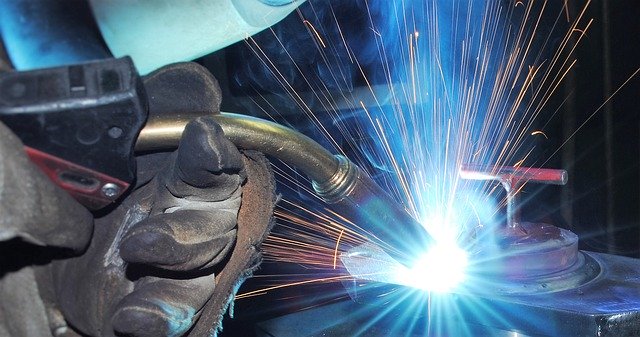
Your safety is paramount and neglecting the right gear is not a risk you should take. You need a welding mask and ideally, one that auto-darkens.
When you are welding the light that is emitted is very bright and it can interfere with your vision (and, in fact, could potentially damage it permanently). The mask prevents you from being blinded and allows you to focus your attention on welding without distraction.
You also need to be wearing gloves and leathers while you are welding. This isn’t because they look awesome but because it prevents you from being splattered with molten metal which is no laughing matter.
You need fairly thick gloves and they don’t have to be very flexible but as much flex as you can get is preferred because that allows you to work more easily but that should never come at the expense of protecting you from burns.
Your gloves must have a reinforced area that sits between your thumb and finger because that’s where you hold the welding gun. Over time, this is the part of the glove most prone to wear.

Never wear open-toed shoes or shoes with a mesh over your toes. You should wear boots (and ideally those with a protective cap) or leather shoes and if you must wear other shoes, make sure to cover them in a non-flammable material.
Here is the full article about MIG welding safety in specific.
Fire Safety
There are some real fire hazards you will encounter when making MIG welds:
- Metal can spray a few feet away from the weld
- When grinding hot sparks can fly even farther from the weld
So, remove any sawdust, paper or plastic from the area before you weld. Make sure that the area around you is kept clean and clear. Always have a fire extinguisher on hand and make sure it’s kept maintained – a fire extinguisher is no use when the pressure is gone.

You should choose CO2 extinguishers because you’re working with electricity. Never use a water extinguisher.
Dealing With Welding Fumes
Fumes can be a hazard to your safety. Always wear a mask and/or a respirator (if you intend to weld for a substantial period of time). Don’t breathe in fumes. Try to weld in a properly ventilated area to prevent fumes from building up.
How To Prepare Prior To Welding
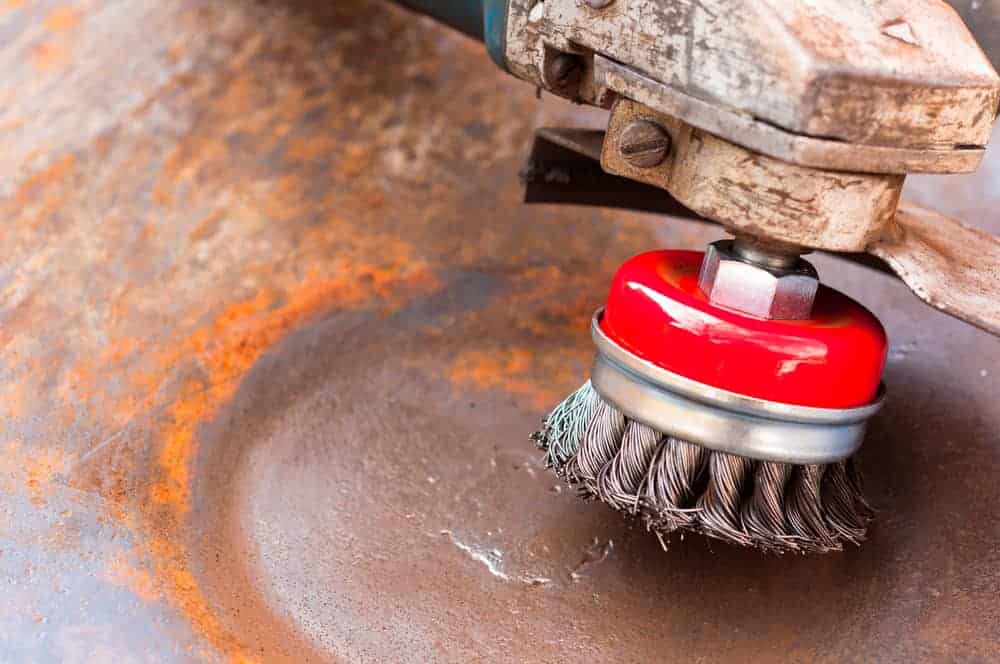
Preparing The Metal
The wire used in MIG welds is not good at resisting contaminants such as rust, oil, dirt, etc. and that means you must prepare the metal for welding.
Take a metal brush (or use a grinder) and make sure to give the naked metal a decent cleaning before you pick up the gun. We wrote a massive guide on welding preparation that you can read here.
It’s also important to make sure that the ground clamp is properly attached to the metal before you begin – if you are getting impedance in the circuit, you may find it affects the wire’s performance.
If you’re working with thick metal and, particularly, if you want to create butt joints then you should bevel the joints to ensure you get the weld penetration that you need.
Preparing The Equipment
Before you start MIG welding and absolutely before you thinking about starting an arc – you must inspect the equipment and make certain that all your cables are plugged in properly and that there is no damage to the fabric of the cables themselves. Then, it’s time to learn how to use your welder.
First, select your electrode polarity. This is easy – MIG welding techniques require you to use a reverse polarity (DC electrode positivity on some machines). You’ll find these settings typically on the interior of the machine. Then choose your gas flow.
Set the flow rate to around 20-25 cubic feet an hour and make sure that the gas is switched on. Check the hose for any leaks (use soapy water and see if there are bubbles). If the hose is leaking, replace it.
Then ensure the spool tension is right. Enough to allow the welding wire to flow but not enough that the spool collapses. The operating manual will tell you how to do this on your machine. Finally, check the consumable items like contact tips and replace anything that needs replacing and clean everything else. Then you’re ready to go.
Selecting The Wire
Most welding machines come boxed with some flux-cored wire. For a MIG welding procedure, you’re going to need to get some suitable wire.
There are two usual types:
- ER70S-3 is used for all-purpose welding
- ER70S-6 for when you’re working on dirty steel
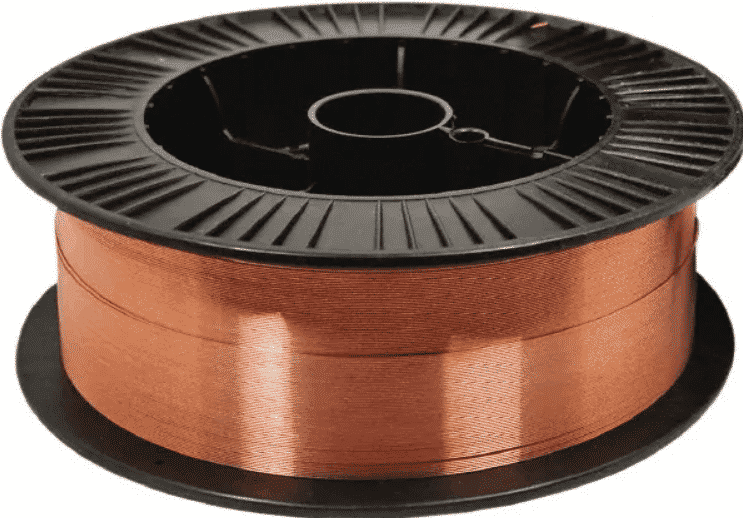
Then choose your wire diameter:
- .030-inch is a decent all-rounder and can work in home situations as well as for motorsports
- .023-inch to reduce heat output with thinner materials
- .035-inch when working with thicker materials at higher heats (or even .405-inch if your machine can handle it)
If you need further advice there should be a chart on the door of your machine which recommends diameters based on metal thickness and metal type.
Arranging The Nozzle & Electrode Stickout
When you’re using the gun, the more wire “stick out” the cooler the weld will be and the shorter, the hotter. Ideally, you want it no more than 3/8″ from the nozzle tip and it shouldn’t go under 1/4″. With exceptionally thin materials, you might need to go a little longer than 3/8″.
It’s important to keep your nozzle clean and free of spatter. Blockages reduce the amount of shielding gas delivered and thus the quality of the weld.
There are gels and sprays you can buy which prevent spatter from sticking to the nozzle of your gun.

How To Lay The First Bead
Before you get to grips with the job in hand, it can help to run a couple of test welding beads (particularly if you’ve not used a welding machine before).
Take a piece of scrap sheet metal and just run a straight line weld over the surface. Once you’ve got a feel for how this works and you’re happy and confident that you can do this comfortably while you work, you’re ready to go and make real a weld bead.
If during the test you feel you need to alter the wire feed speed or the power setting, go right ahead and do that. It’s why you’re testing – to make the machine work for you.
What To Do When Welding Metal Together – How to MIG weld
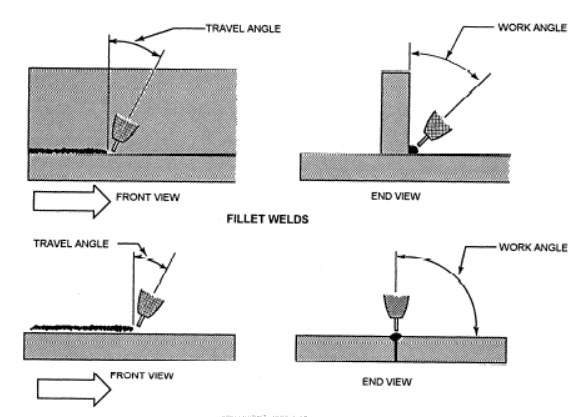
Mastering The Travel and Work Angle
What is the travel angle?
The angle relative to the gun if it were held in a perpendicular position to the surface of the weld. In most conditions, this will be between 5 and 15 degrees. If the angle reaches 20-25 degrees it’s likely to reduce the penetration, increase the level of spatter and may even interfere with the stability of the arc.
Your work angle, on the other hand, is simply the angle of your gun relative to the angle of the joint being welded. It can vary massively depending on what position you are welding from and the configuration of the joint.
Should You Push Or Pull?
There are two ways to weld:

Pushing the gun
This is when you push the gun in a position so that the head is in advance of the weld puddle. It will give you a wide, flat bead with less penetration (this is due to the arc force being in advance of the puddle).

Pulling the gun
This is where the gun points backward of the weld puddle and you drag it away from the metal. And as you might expect this will result in a narrower, deeper bead than pushing does.
If you want to know how to weld steel, then you can use either a push or a pull but you will probably find that pushing gives you a better vantage to see what you’re doing.
Different Welding Positions
Flat Position Welding
This is the simplest position to make your welds because your metal will lay flat on your welding table while you will simply MIG weld on it from above the joint.
- The Butt Weld. This is a 180-degree joint and you hold your gun perpendicular to the piece (allowing for an angle of travel) and deploy the metal straight into the joint. If there’s a big gap you can use a back and forth motion to help fill it. If you want to avoid undercut, pause at the bead.
- The T-Joint. This is a 90-degree joint. You want to keep the gun equidistant from each piece (at 45-degrees). Change the working angle slightly if you make multiple passes to keep your bead even and avoid undercuts.
- The Lap Joint. You keep the gun at a 60-70 degree angle and if the metal is thick, increase the angle.
Sometimes in order to achieve best results, weld joint is specified on welding drawings by a specific weld joint symbol. For welders, understanding the welding symbols is as important as learning how to weld properly.
Horizontal Position Welding
When working from horizontal, you’re going to find your work is affected by gravity. You want to reduce the work angle by 0-15 degrees to prevent sag or rollover on the joint. However, the travel angle remains the same.
If you’re working on thick metal and need to make multi-pass welds or you’re bridging a small gap with a poor fit, you can use weave beads to fill the weld joint. You may need to reduce your voltage and amperage slightly in this position but you may find things work fine if you keep your flat position settings too.
How to MIG weld – Vertical Position
This is a much harder kind of welding and you need to pay attention to the pre-weld setup routing to make the best welds.
One of the best MIG welding tips is to reduce the voltage and amperage by around 10-15% when compared to your flat welding settings.
Vertical down welding is used to reduce arc penetration when working on thin metals. This, in turn, stops excessive melt through.
You want to start at the top of the joint when vertical down welding and head down the weld. To prevent burn through, keep the wire directed away from the weld puddle and on the leading edge. If you need to flatten the weld crown, give it a very slight weave.
To vertical up weld, you want to work from the bottom of the joint and run up it. This will improve penetration on thicker materials (those of over 1/4 inch) and you should look to change the travel angle to 5-15 degrees below the perpendicular.
Again you can use a slight weave if you want to take control of the weld puddle and the size, shape, and cooling of the outcome.
Overhead Position Welding
You want to tackle overhead position welding only when you are confident that it’s safe to do so. When you’re under the weld, you risk sparks and spatter falling on you.
This means you must be fully covered in protective gear for your head and body. Burning yourself will not be fun. You can use any of the techniques you normally use when welding but it’s important to move quickly so that you’re not letting metal fall out of the joint and onto you.
You might want to reduce the diameter of your weld wire AND the voltage and amperage to give you better control when doing an overhead position.
How To Grind Down The Weld
If appearance doesn’t matter or the weld is simply going to be hidden from view – it doesn’t matter if you grind it or not. However, if the weld is in view then you’re going to want to clean it up a little most of the time.
This is done by a process of grinding. You need to grind carefully because otherwise, it’s entirely possible to ground out the weld or even gouge the metal that you’ve been working on.
So, make sure to treat the angle grinder like you would a sander (move it around) and make sure it doesn’t grow too hot or bore through too much metal in one spot.
Frequently Asked Questions (F.A.Q)
What Can I Weld With A MIG Welder?
You can MIG weld almost any type of metal or metal alloy including steel, stainless steel, carbon steel, aluminum, magnesium, nickel, bronze, and copper. However, you can only work on materials of medium thickness or less.
Can You MIG Weld Without Gas?
Only if you are using a flux core welder. If you are working with any other kind of wire, you will need gas to protect the weld from contaminants.
Can I Weld Aluminum With My MIG Welder?
Yes, in general, but you must choose a 100 percent Argon shielding gas or you risk burning the Aluminum and you cannot do MIG welding with anything under 0.074-inch thickness without having specialized pulsed equipment to do the welding.
What Causes Excessive Splatter In MIG Welding?
The most common cause is working with excessive speed on the wire feed, it may also be due to metal composition, a coating on the metal, or dirty metal or not enough shielding gas reaching the weld.
Can You Weld Over Slag?
With experience, a good welder can often have several passes without needing to clean up any slag and still form a good weld. This is something you are likely to learn over time.
Is MIG Welding Easy?
A lot depends on your abilities but yes, in terms of welding, this is one of the easiest forms to learn. It’s often nicknamed “hot glue gun” welding because of that.
Do You Push Or Pull MIG Welding?
You can push or pull but if you want a wider, flatter bead, you pull and if you want a narrower, deeper bead, you go with a push. That’s the basics of how to use a MIG welder.
What Is The Easiest Way To Weld?
It depends on the job that you are doing and some jobs may require a specific kind of welding but MIG is generally considered the easiest form of welding for most work.
Conclusion
Well, we hope that our “MIG welding how to” has been helpful to you and that you’re ready to start welding and reaping the benefits for your home and automobile, at least.
There are many MIG welding uses and once you’ve developed your technique and learned how to MIG weld, you’ll be surprised at how valuable a skill it can be and you’ll wonder why you never learned it before?
Resources:
- Controlling Hazardous Fume and Gases during Welding at OSHA.GOV
- Welding Processes Handbook (Second edition) by KlasWeman Woodhead Publishing Series in Welding and Other Joining Technologies 2012, Pages 75-97
- What Is GMAW? by Oanh Nguyen at www.weldingschool.com
- Gas Metal Arc Welding Procedure selection by lincolnelectric.com
- GMAW introduction by ESAB.com
- MIG Welding Tips and Techniques for Beginners by Ron Covell at Millerwelds.com