TIG welding is one of the most challenging processes to master, but it yields the highest quality results, clean and aesthetic welds. However, to get there, you will need a lot of time and patience.
Our detailed guide on how to TIG weld will help you understand the fundamentals and the things required to achieve the highest quality welds.

That includes TIG welding equipment, such as welder, filler metal, or shield gas, but also suitable technique and tips. So without further ado, let’s dig in!
What is TIG Welding?
TIG welding stands for Tungsten Inert Gas or Gas Tungsten Arc Welding, and it presents a specialized type of arc welding that uses a non-consumable tungsten electrode to heat the metal and create a weld.
The tungsten electrode then creates an electric arc that melts the workpiece, forming a weld pool. The welder then manually feeds a filler rod into the weld pool to add strength and stability to the joint.

This process is known for its superior quality and high accuracy, making it an ideal choice for welding thin-gauge metals, small components, and complex shapes. TIG welding works excellently in applications where the highest levels of precision are required, such as aerospace components, medical equipment, and jewelry.
The main advantage of TIG welding is its ability to produce high-quality, strong welds with minimal distortion or contamination. Unlike the MIG welding process or stick welding, which use a consumable wire to build up material on the workpiece, TIG welding adds only as much filler material as needed without creating excess spatter or slag.
This makes it ideal for critical where precision is paramount. Aluminum welding with TIG looks exceptionally better compared to MIG welding aluminum.
What Do You Need To Start TIG Welding?
To start TIG welding, you will need certain TIG welding equipment and knowledge of the welding process. First, you need the right equipment. This includes a TIG welder, a foot pedal (or torch switch) to control the current, a tungsten electrode, a welding torch, shielding gas, filler metal, and protective clothing.
You will also need to know how to set up your TIG welder correctly. This involves selecting the correct current and voltage settings for your specific application and material thickness.

You should also have an understanding of the principles of TIG welding before you start. This includes the importance of using the proper electrode for each material type and the correct flow rate for the shielding gas. Additionally, it is important to understand how to maintain an arc length that is optimal for your welds. This means adjusting your foot pedal (or torch switch) to control the current as needed during welding.
Next, you need to prepare your workpiece for welding. This includes cleaning and degreasing it as well as properly clamping it in place before starting the weld. It is also important to use the right filler metal for each material type and ensure that all edges are beveled or chamfered properly before beginning.
Finally, once you are ready to learn TIG welding, it is important to practice on scrap metal that is similar in size and shape to your workpiece. This will help you become accustomed to TIG welding techniques, such as pulse welding and oscillation, as well as developing an even bead profile on your welds. With practice, you will become a more proficient, skilled TIG welder and achieve desired weld quality with each weld!
How To TIG Weld
Now that you know what is TIG welding and what you will need to successfully perform it, we will closely talk point by point about each. TIG welding is significantly more challenging than MIG welding or Stick welding, but with practice, you will become more proficient in TIG welding and achieve better results with each weld!
However, to get there, you will have to follow each step closely, and here is a detailed guide on how to TIG weld properly.
Choosing The Right TIG Welder For Application
To TIG weld, you will need a TIG welding machine that is capable of producing an arc between an electrode and the workpiece. The power required for TIG welding depends on the thickness and type of material being welded.
Welding thin materials, such as aluminum or steel, will require TIG welders with an input power of at least 120 volts (V) and a welding power of 60 amps (A). When welding thicker materials such as steel or cast iron, you will need a power source with at least 230 V and up to 200 A. If you plan on welding both thick and thin metals, you can always opt for a dual voltage TIG welder rated 5-250 amps.
When choosing a TIG welder, it is important to pay attention to the features and settings available. The most common type of TIG welding is DC welding, which means you will need a welder that is capable of using a DC current.

However, if you plan to weld aluminum or exotic metals such as magnesium or nickel alloys, you will need to switch to AC welding. That’s why the best choice is buying an AC/DC TIG welder, but keep in mind that they are pricier, and you don’t need them if you plan on welding only steel.
You should also consider the availability of pulse welding, which is useful for controlling heat input and reducing distortion in welds in thin materials. Other features that may be useful are an adjustable amperage control, adjustable hot start/crater start, adjustable post/pre-flow settings, adjustable inductance control, and an adjustable gas flow control. These will help you control the entire welding process, from start to end, but you don’t need all of them as a beginner. These are more reserved for seasoned welders that like to fine-tune their TIG machines to perfection.
The choice of a TIG welder also depends on the size of your welds, the quality of your welds, and the level of penetration required for the welds. It is important to choose a TIG welder that has enough amperage for the job at hand; too little amperage can result in incomplete penetration or weak spots in your welds. The size of your welds will also determine the size of the electrode needed; smaller electrodes are better suited for thinner materials while larger electrodes are better suited for thicker materials.
TIG welding torch – Rating, Sizes, And Cooling Type
The torch you will need to TIG weld will depend on the type of welding job you are planning to take on.
Generally speaking, TIG welding torches are available in a variety of sizes and power levels, ranging from small handheld models with 20-30 amps of power up to large industrial models with over 500 amps of power.
As a hobbyist, the best practice is to match the torch rating to your welder, which is approximately 250 amps. However, TIG welding is known for precision, so the best choice is the smallest torch that can handle your welding demands.

In addition to size and power, there are also different types of TIG torches to choose from, including air-cooled or water-cooled designs. Air-cooled torches are typically lighter and less expensive than their water-cooled counterparts, and as a hobbyist or beginner, you are likely to work with one of these. They also tend to have shorter lifespans due to the heat generated during the welding process. On the other hand, water-cooled torches are heavier and more expensive but can handle higher amperages and provide longer service in heavy-duty applications.
Choosing Shielding Gas For TIG Welding
Shielding gas plays a crucial role in TIG welding, as it protects the weld puddle and tungsten electrode from contamination. The choice of shielding gas will ultimately depend on the type of material you’re welding and the environment in which you’ll be working. If you are ever in doubt about what shielding to use for TIG welding, start with pure argon.
100% Argon offers a great head start when welding thin and medium-thickness aluminum and steel, but it also works great with metals such as brass, copper, zinc, cast iron, or gold.
However, the argon has a somewhat shallow penetration, so when welding thicker pieces, you will need to add helium. As a rule of thumb, the more helium you add, the more penetration you get, but you don’t want to use it too much as it can cause more spatter and inconsistent results. Generally, a mixture of 75% Argon and 25% helium is used, but you can tweak the content of these to 50-75% of both.
When TIG welding stainless steel, you can add small doses of reactive gases such as hydrogen or nitrogen to an argon-rich mixture. 95-97% of argon mixed with 3-5% of N, or H is suitable to specific stainless steel grades. Besides the actual gas, you should consider the gas flow, but we will talk about that in the welding parameters section.
Selecting The Filler Metal For TIG welding
When TIG welding, you will need to use filler metal and tungsten that are appropriate for the type of TIG welded material. The type of filler metal and tungsten you use will depend on the material you are welding, the thickness of the material, how much heat is needed for the weld, and any other specific requirements your project may have.
Steel filler rods and MIG wire come in different grades and sizes.

The grade of the filler rod is determined by its chemical composition and is usually denoted with a number such as ER70S-6. ER70S-6 is a common steel filler rod and is used in general TIG welding applications on mild and low alloy steels you are likely to use.
The most common alloys used for TIG welding aluminum are 4043 and 5356. 4043 is an aluminum-silicon alloy that is typically used for welding aluminum alloys that are heat treatable. 5356 is an aluminum-magnesium alloy that is typically used for welding wrought or cast aluminum alloys that are not heat-treatable.
Stainless steel filler rods come in different grades and sizes. The most common stainless steel grades used for TIG welding are 308L, 309L, and 316L. 308L is typically used for welding stainless steels with up to 25% chromium content, while 309L and 316L are typically used for higher chromium content (25%-50%).
When selecting a size for the filler rod, it should be within 1/16 inch of the thickness of the base material. For example, if you are welding two pieces of 3/16-inch thick aluminum, you should use either a 3/32-inch or 1/8-inch diameter filler rod.
How To Select And Prepare Tungsten
When choosing a tungsten electrode for TIG welding, it is important to consider its composition. Pure tungsten electrodes contain no other elements and are generally used for aluminum or magnesium welding. If you need to weld steel or stainless steel, a 2 percent thoriated tungsten electrode is usually recommended. Tungsten alloys have better conductivity and longer life than pure tungsten electrodes. As with the Aluminum filler rods, tungsten electrodes come in varying sizes depending on the size of your job.

The tungsten electrode is the most critical component of the welding process since it helps to maintain a stable welding arc and creates the desired weld bead shape. Before starting any welding work, it is essential to select the correct type and size of tungsten electrode, as well as prepare it correctly.
When preparing a tungsten tip, the main goal is to ensure that it has a clean point for optimal performance. Have a rounded end or balled tip if welding is done with alternating current or a sharp end or pointed tip when DC TIG welding steel. To achieve this point, use a grinding stone or diamond wheel grinder.
Protective Gear Recommended For TIG Welding
Protective gear is an essential part of TIG welding. In order to keep welders safe, they should always wear the appropriate protective clothing and equipment.
- Welding helmet: A welding helmet is necessary to protect the eyes and face from harmful UV rays, sparks, and debris. It should be made of a flame-resistant material and have a protective lens shade that is rated at least 14.
- Gloves: Unlike with MIG welding, TIG welding gloves should be made of thinner leather or heat-resistant material to protect the hands from hot metal, slag, and sparks, but also allow for good dexterity.
- Apron: A leather apron protects the body from welding sparks and hot metal fragments. It should fit snugly around the waist and cover the chest, abdomen, and legs.
- Welding boots: Heavy-duty boots with steel toes protect feet from heavy objects, sparks, or hot metal. They should also have non-skid soles for better grip.
- Safety glasses: Safety glasses are necessary to protect against flying sparks, debris from grinding or cutting metal, and ultraviolet light emitted from the electrical arc. The lenses should be rated at least ANSI Z87.1-2010.
- Hearing protection: Earplugs or earmuffs are necessary to protect against loud noises associated with welding operations such as grinding or cutting metal. Earmuffs should be rated at least 25 decibels (dB).
- Respirator: A respirator mask is important to protect against airborne particles created during welding operations such as dusts, fumes, mists, gases, vapors, and smoke. The mask should be fitted properly and rated at least N95 by NIOSH (National Institute for Occupational Safety and Health).
Weld Preparation
Weld preparation is a crucial step when it comes to TIG welding, as it determines the quality of the weld and its long-term durability. Proper preparation is necessary to ensure the best results when TIG welding. Before welding, you must make sure that the base metals are clean and free of any dirt, rust, or other debris. This can be done with a wire brush or grinder, or through chemical treatments such as degreasing and pickling.
You should also ensure that the metals being welded fit together snugly. If there are gaps between them, you should fill them in with an appropriate welding filler material. This step is important for avoiding porosity issues during welding, which can weaken the joint and lead to structural failure over time. Further, make sure that the edges of the metals being welded are well-defined and free from burrs or other imperfections.
TIG Welder Settings
When TIG welding, you need to adjust the settings depending on the joint they are welding and the material they are using. Generally, you should consider Polarity, Amperage, and Gas Flow.
The polarity affects how current runs through your weld piece, and it can be set to DC- (DCEN), DC+(DCEP), and AC. When using DCEN, electrons flow from the electrode to the workpiece. This causes heat to be generated at the workpiece, resulting in a deep, focused weld.

DCEP reverses the flow of electrons so that they go from the workpiece to the electrode. This helps reduce oxidation and improves arc stability. AC is used when welding aluminum or exotic metals since it effectively removes oxide buildup on the surface of the metal. DCEN polarity is the most common choice for TIG welding when the cleaning action of the DCEP or AC is not needed.
The amperage (also referred to as current) needs to be set correctly. Amperage is measured in amps, and it is directly related to the amount of heat that is generated during the TIG welding process. Too little amperage will result in a weak weld, and too much amperage can create a weld that is too hot, leading to weld defects and possible warping of the material. For example, when welding mild steel, learning TIG welding will require an amperage setting between 70-200 amps. However, this range can vary depending on the type of joint being welded, the thickness of the material being used, and other factors.
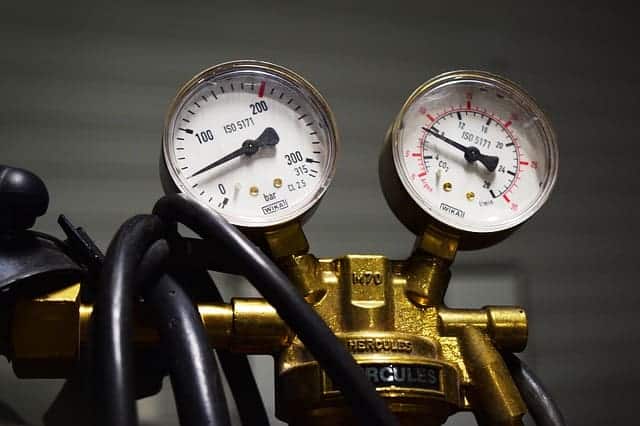
Gas flow is measured in cubic feet per hour (CFH), and it controls how much shielding gas is used during welding. The optimal gas flow rate depends on both material being used and type of joint being welded; for example when welding aluminum a typical gas flow rate is 15-25 CFH whereas when welding steel a typical flow rate would be 20-35 CFH. Too much gas will cause turbulence in the arc and reduce penetration into the joint; too little gas can lead to air contamination and porosity in your welds.
Welding Technique For TIG welding
TIG welding technique is something that comes with time and practice, but all can agree mastering TIG is the most challenging task. As a beginner, you can run straight or stringer beads before you master more advanced methods. Regardless of the technique, there are certain tips.
When TIG welding, it is important to maintain a steady arc length and arc speed. The arc length should be kept at a consistent distance away from the metal being welded (typically 1/8 inch to 3/16 inch.)
This helps to ensure that the heat is evenly distributed throughout the joint and that there is enough penetration of the molten metal into the joint. The arc speed should also be kept relatively slow as this helps prevent over-penetration of the weld, which can cause weak spots in the weld or create too much heat in one area.
The travel and working angle of the TIG torch can drastically affect the quality and consistency of the weld. The travel angle is the angle at which the TIG torch moves along the joint when welding. This can vary from 10-20 degrees depending on the type of joint being welded, but a general rule of thumb is to keep it between 15-20 degrees. The working angle is the angle at which the TIG torch is pointing towards the joint when welding. This angle should always be perpendicular to the joint, or 90 degrees.
The travel angle is important because it affects how much heat is transferred to the TIG weld. If it’s too steep, then there will be too much heat applied, which could cause warping or burn-through of the material. Too shallow of an angle will not provide enough heat and can cause poor fusion and lack of penetration into the base material. Having a consistent travel angle with each weld helps to ensure uniformity and quality in each weld.
Advanced TIG Welding Techniques
Besides common rules, there are several popular TIG welding techniques used by experienced welders, but we will talk about the two most common ones. These are stacking the dimes and walking the cup. Each has its unique set of advantages, but both take time and patience to master.
Stacking the dimes involves passing the TIG torch over the joint multiple times from different angles in order to create an even and consistent weld.

This technique allows for superior control of heat input, which is important for avoiding warping or cracking of the material being welded. Additionally, it ensures that there is adequate penetration of the filler metal into the joint, creating a strong bond between the two pieces.
It is important to start at one end of the joint and move slowly along its entire length. As you progress, you will want to make sure that each pass with the torch slightly overlaps the previous pass. This overlap helps to ensure that there are no gaps in coverage and creates a stronger bond between the two pieces being welded together. You can see welders trying to get similar results with MIG welds, but only with specific features such as double pulse.
Walking the cup is primarily used for TIG pipe welding but there are definitely a few other applications where being able to walk the cup can make for a better looking weld. This process involves slowly moving the welding cup over the surface of the metal while maintaining a constant arc length and voltage. The result is a smooth, uniform weld that is free from defects.
The walking-the-cup technique requires precise control of the TIG machine and requires the welder to be able to move the cup at a consistent speed while maintaining a consistent arc length and voltage. The arc length should be set between 3/8” and 5/8” depending on the material being welded. Walking the cup is a very popular tig welding technique for pipe welding because there is no issue with propping hands or fingers on hot metal, and because it allows for such an even rate of progression.
Post Weld Treatment
Post-weld treatment in TIG welding is essential to ensure a successful weld. The most common post-weld treatments are the removal of slag, grinding, and stress relieving.
However, first, inspect the completed weld for defects such as porosity, undercut, lack of fusion, cracks, or other imperfections that may have occurred during welding. If any defects are observed, they must be rectified before proceeding with any further steps in post-weld treatment.

Slag is a byproduct of welding that can cause porosity and undercut of the weld joint if not removed properly. Slag can be removed with a hand chipping hammer or wire brush. It is important to ensure that all slag has been removed before proceeding.
Grinding is the next step in post-weld treatment and involves using an angle grinder to smooth the weld joint and remove any imperfections or irregularities. This will help create an even surface for the weld joint and improve its strength and appearance.
Stress relieving involves heating the weld joint to reduce residual stresses, which can occur during welding due to thermal expansion and contraction of the base material. The temperature at which the weld joint should be heated depends on various factors, including the thickness of the material being welded and its composition.
Tips for Successful TIG Welding
- Always wear the appropriate safety gear such as a welding helmet, gloves, and an apron or jacket.
- Set up your equipment correctly and ensure that your torch is connected to the power source and gas supply.
- Clean the surface of the metals you are welding before starting
- Select the right type of filler metal for the job, based on the thickness of the metal you are welding.
- Make sure that the arc length is correct; too short an arc will result in poor penetration while too long an arc can cause spatter and undercut
- Adjust your amperage according to the thickness of the material you are welding; thicker materials require higher amperage while thinner materials require lower amperage
- Set up your torch correctly by adjusting its angle; this will help ensure that your bead has good penetration and strength
- Move your torch in a slow and consistent manner; this will help ensure that you get even penetration throughout your welds and prevent spatter or undercut.
- Make sure to add filler metal as needed during your weld; this will help ensure that your weld has good strength and durability.
- When finished with your welds, make sure to clean any excess spatter or slag from the joint with a wire brush or grinding wheel before allowing it to cool down completely.
Conclusion
TIG welding is an excellent welding technique that can be used to join multiple types of metals. It is a more advanced technique than MIG or Stick welding and requires some skill and training to master it properly. A TIG welder should always use the proper safety gear and follow the instructions provided in the manual.
TIG welding can be used to achieve a strong, reliable weld on materials such as stainless steel, aluminum, copper, magnesium and other exotic metals, unlike MIG welder. With the right tools and practice, TIG welding can become a rewarding and useful skill for any metalworker.
Resources
- https://www.millerwelds.com/resources/article-library/tig-it-how-a-tig-welder-works-and-when-to-tig-weld
- https://www.millerwelds.com/resources/article-library/welding-tips-the-secret-to-success-when-tig-welding
- https://www.twi-global.com/technical-knowledge/job-knowledge/tungsten-inert-gas-tig-or-gta-welding-006
- https://www.weldingtipsandtricks.com/tig-welding.html
- https://unimig.com.au/the-ultimate-guide-to-tig-welding/
- https://www.fronius.com/en/welding-technology/world-of-welding/tig-welding